Skip to content

Cookies 🍪

This site uses cookies that need consent.

Learn more

Zur Powderguide-Startseite Zur Powderguide-Startseite

Language selection

Search PowderGuide

news

Digital on the move - tilt maps on your smartphone

Where am I? Where are the dangers lurking? Where do I want to go?

by Simon Pfandler 02/25/2021
Modern phones can not only replace the classic map, but also offer compass and GPS functions - as long as the battery keeps up. Slope maps are particularly useful for us winter sports enthusiasts. Below is a guide on how to use open source slope maps on your cell phone without having to subscribe to an app. A comparative overview of some of the more popular subscription map apps will follow soon.

Orientation in the terrain

First of all, I would like to point out that a smartphone is not a substitute for dealing with the topic of orientation, but can only support us in this. Anyone who has learned their first steps in the terrain with a map and compass will appreciate their independence from power sockets or cell phone reception as well as the clarity of a good topographical map. Nevertheless, the linking of the exact location determined by GPS with the display of a map is definitely a great benefit for us ski tourers.

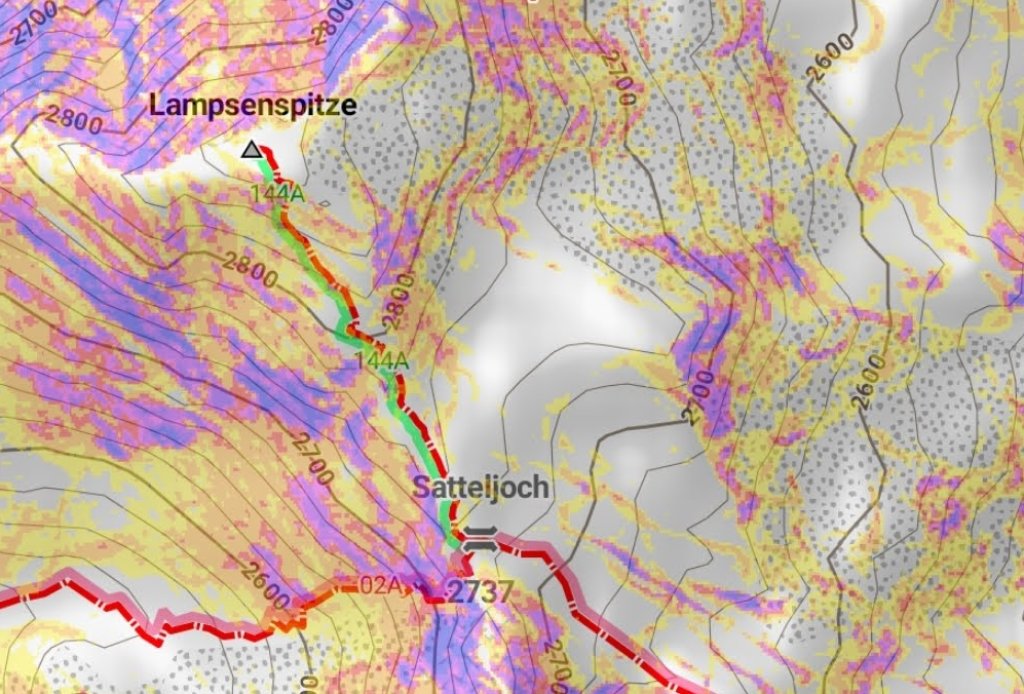
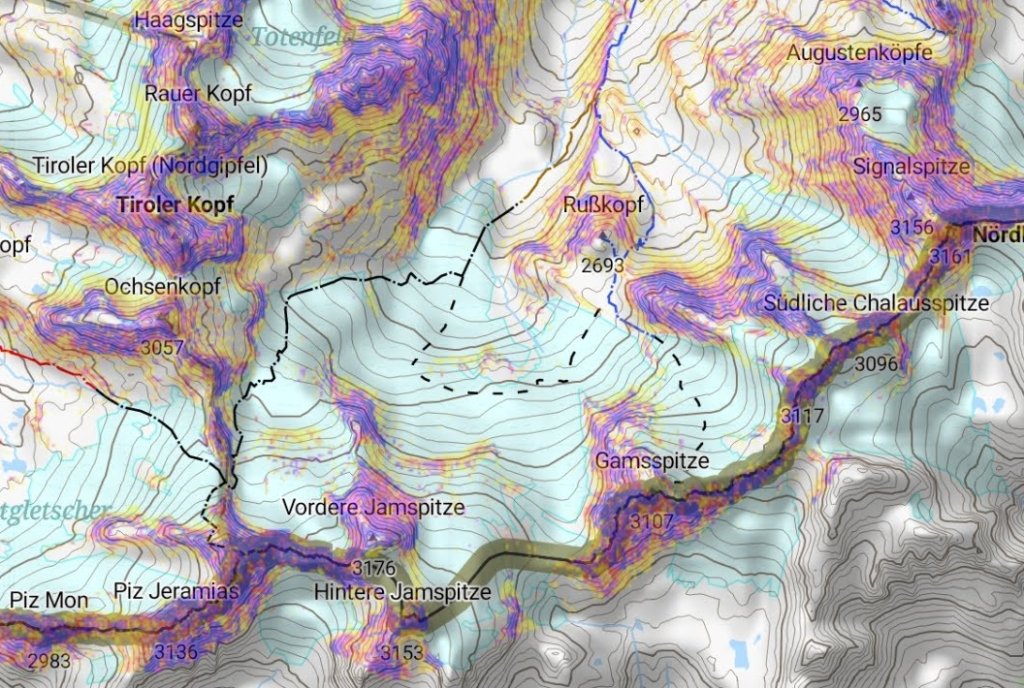
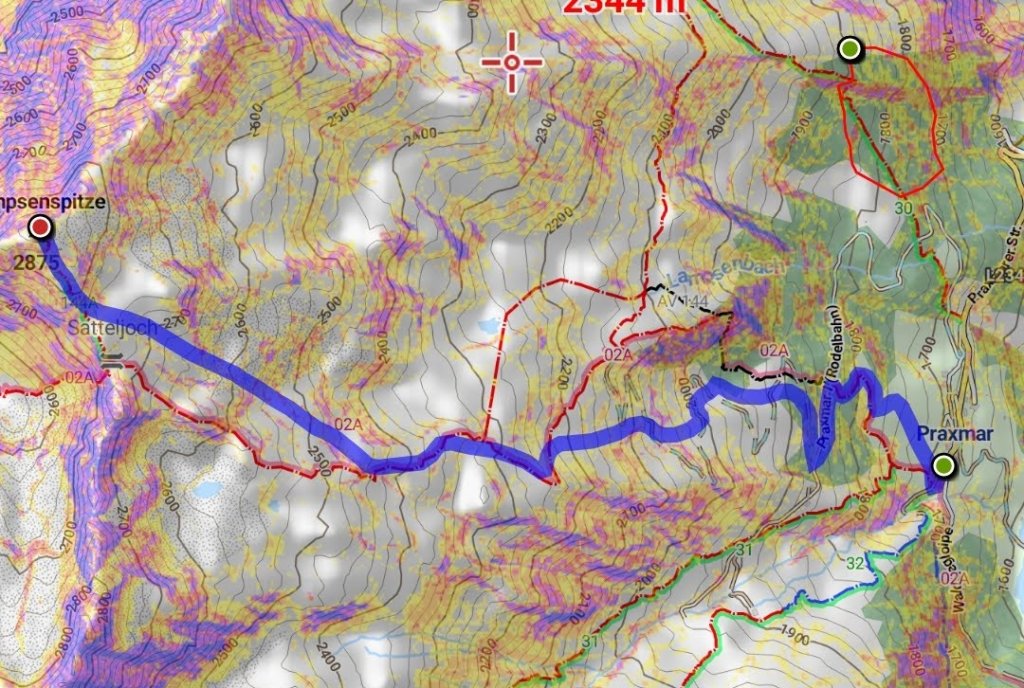
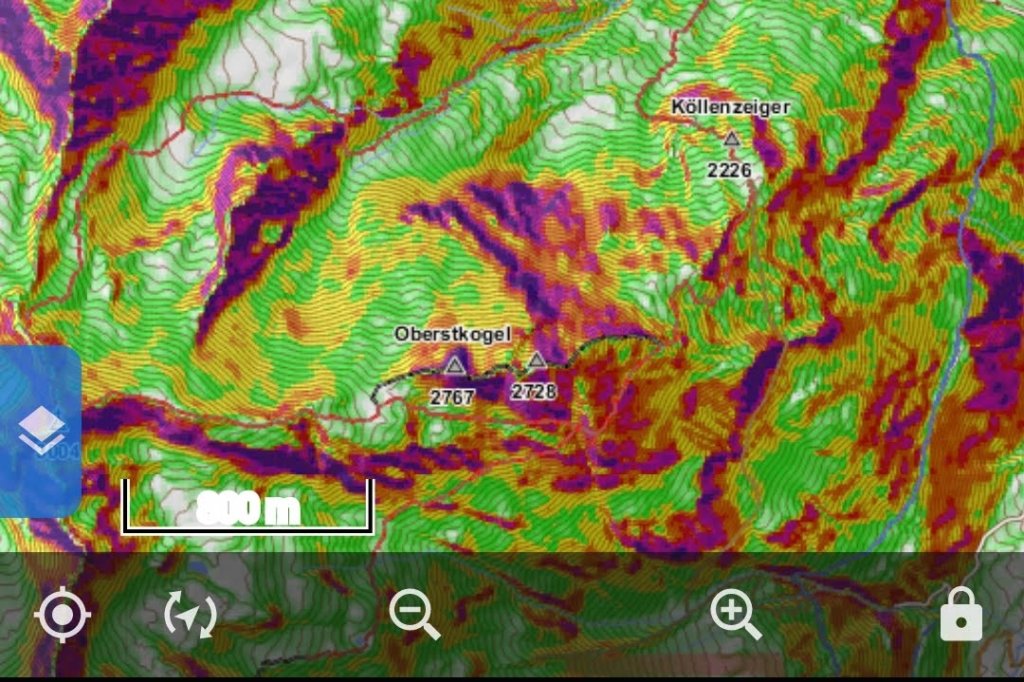
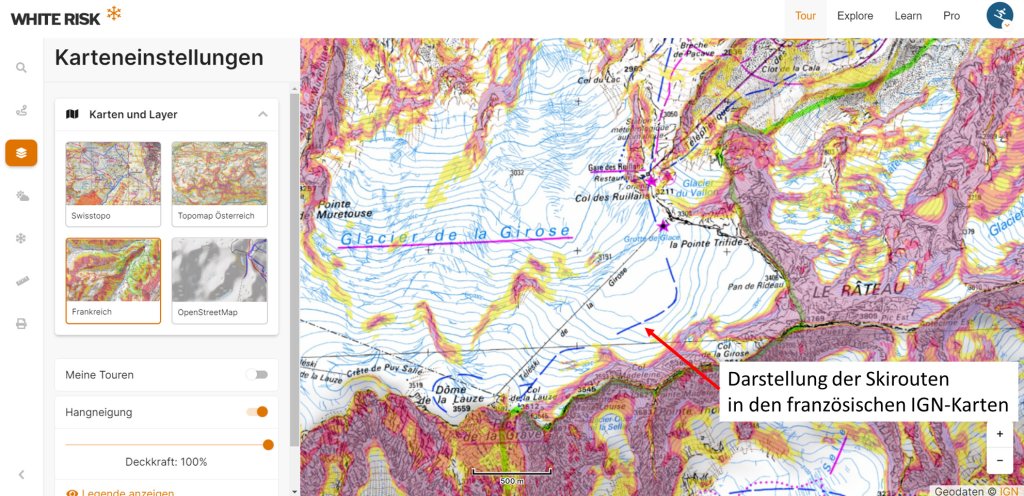
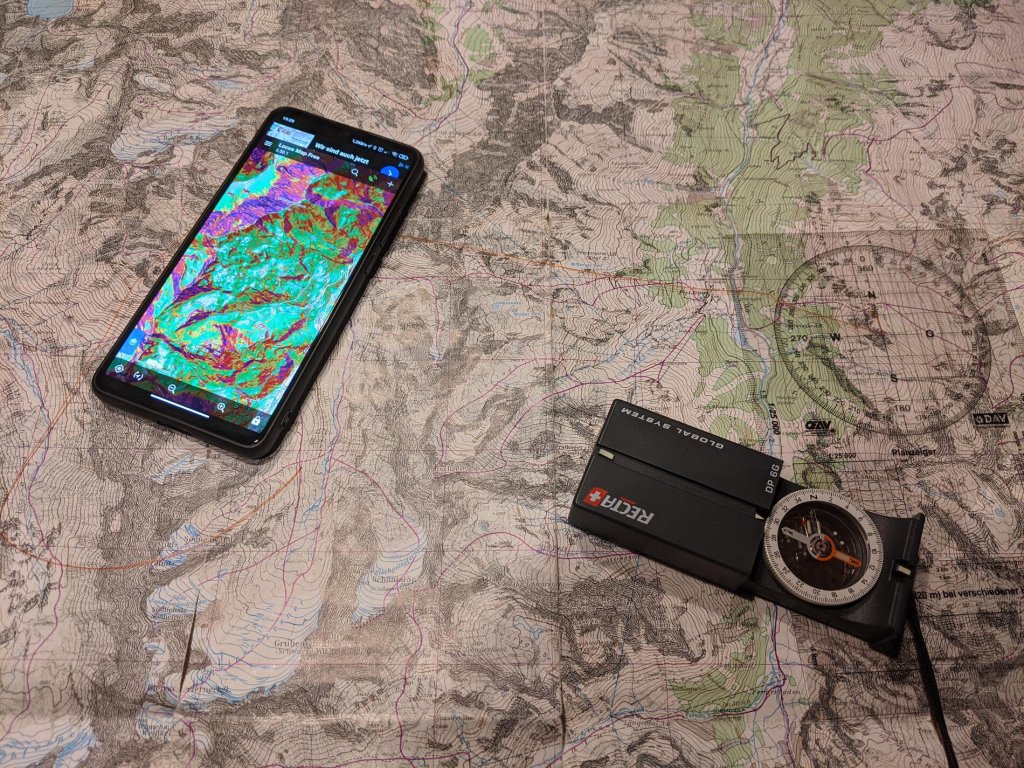
We know from avalanche science that the slope gradient is one of the most important factors in avalanche events. Therefore, assessing the steepness of the terrain around us is very important. There are now very good maps on which the slope gradient is superimposed in multi-colored representation. This provides us with good assistance, but of course our own assessment is always the final responsible consequence.

Tools

Openslopemap

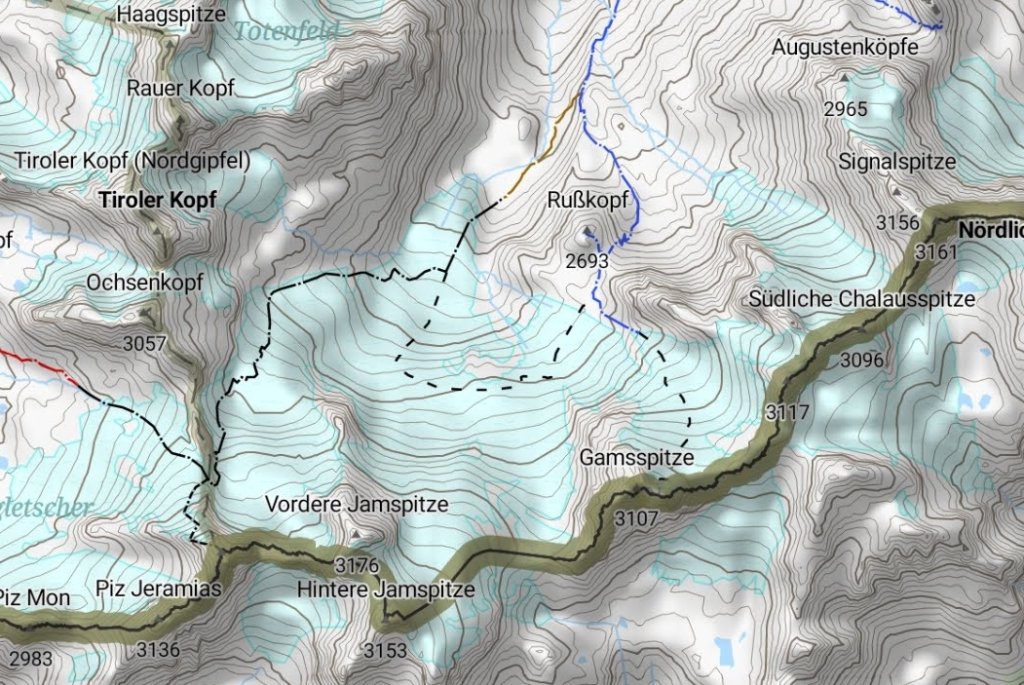
The developers of Openslopemap process the freely accessible digital terrain models and use them to generate a map with the most important slope gradients for winter sports, contour lines, shading and an Openstreetmap layer. These maps are freely available on the internet and can be viewed online or downloaded from the project page. To view the map offline, however, you also need a map app on your smartphone.
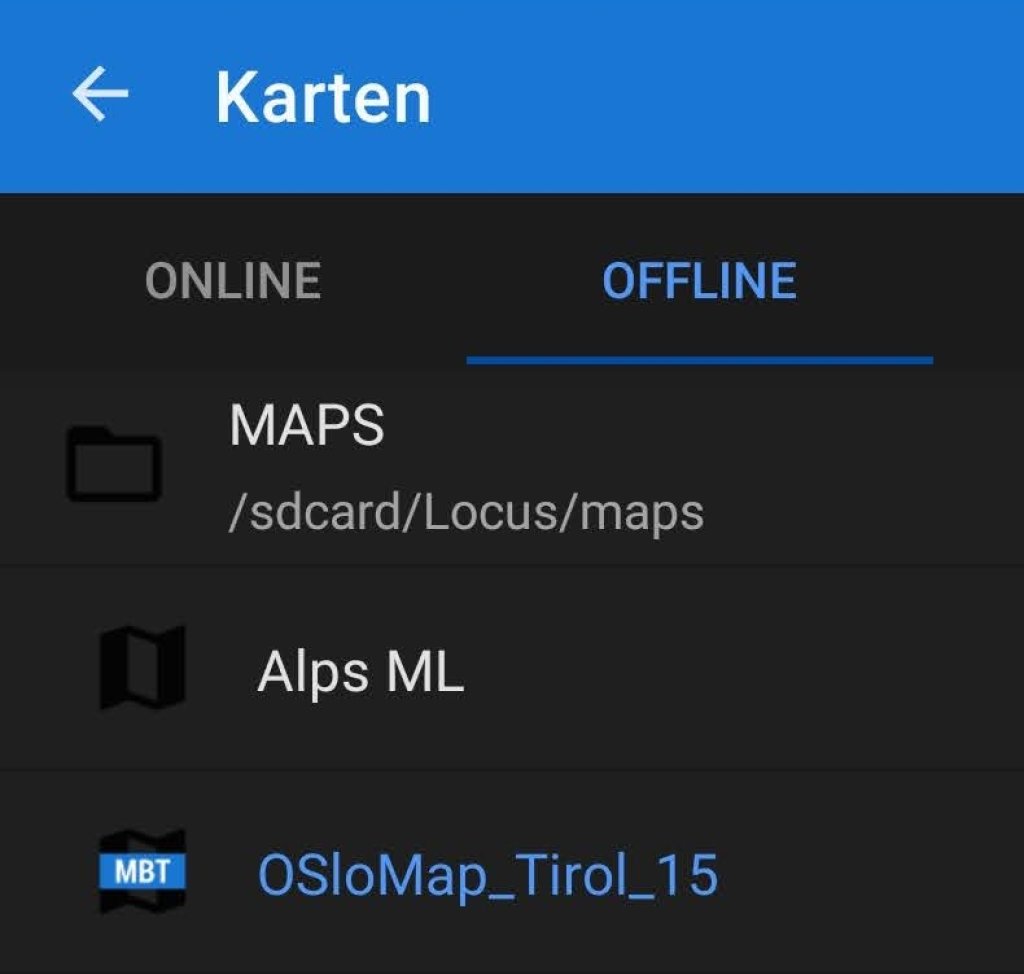
Map app

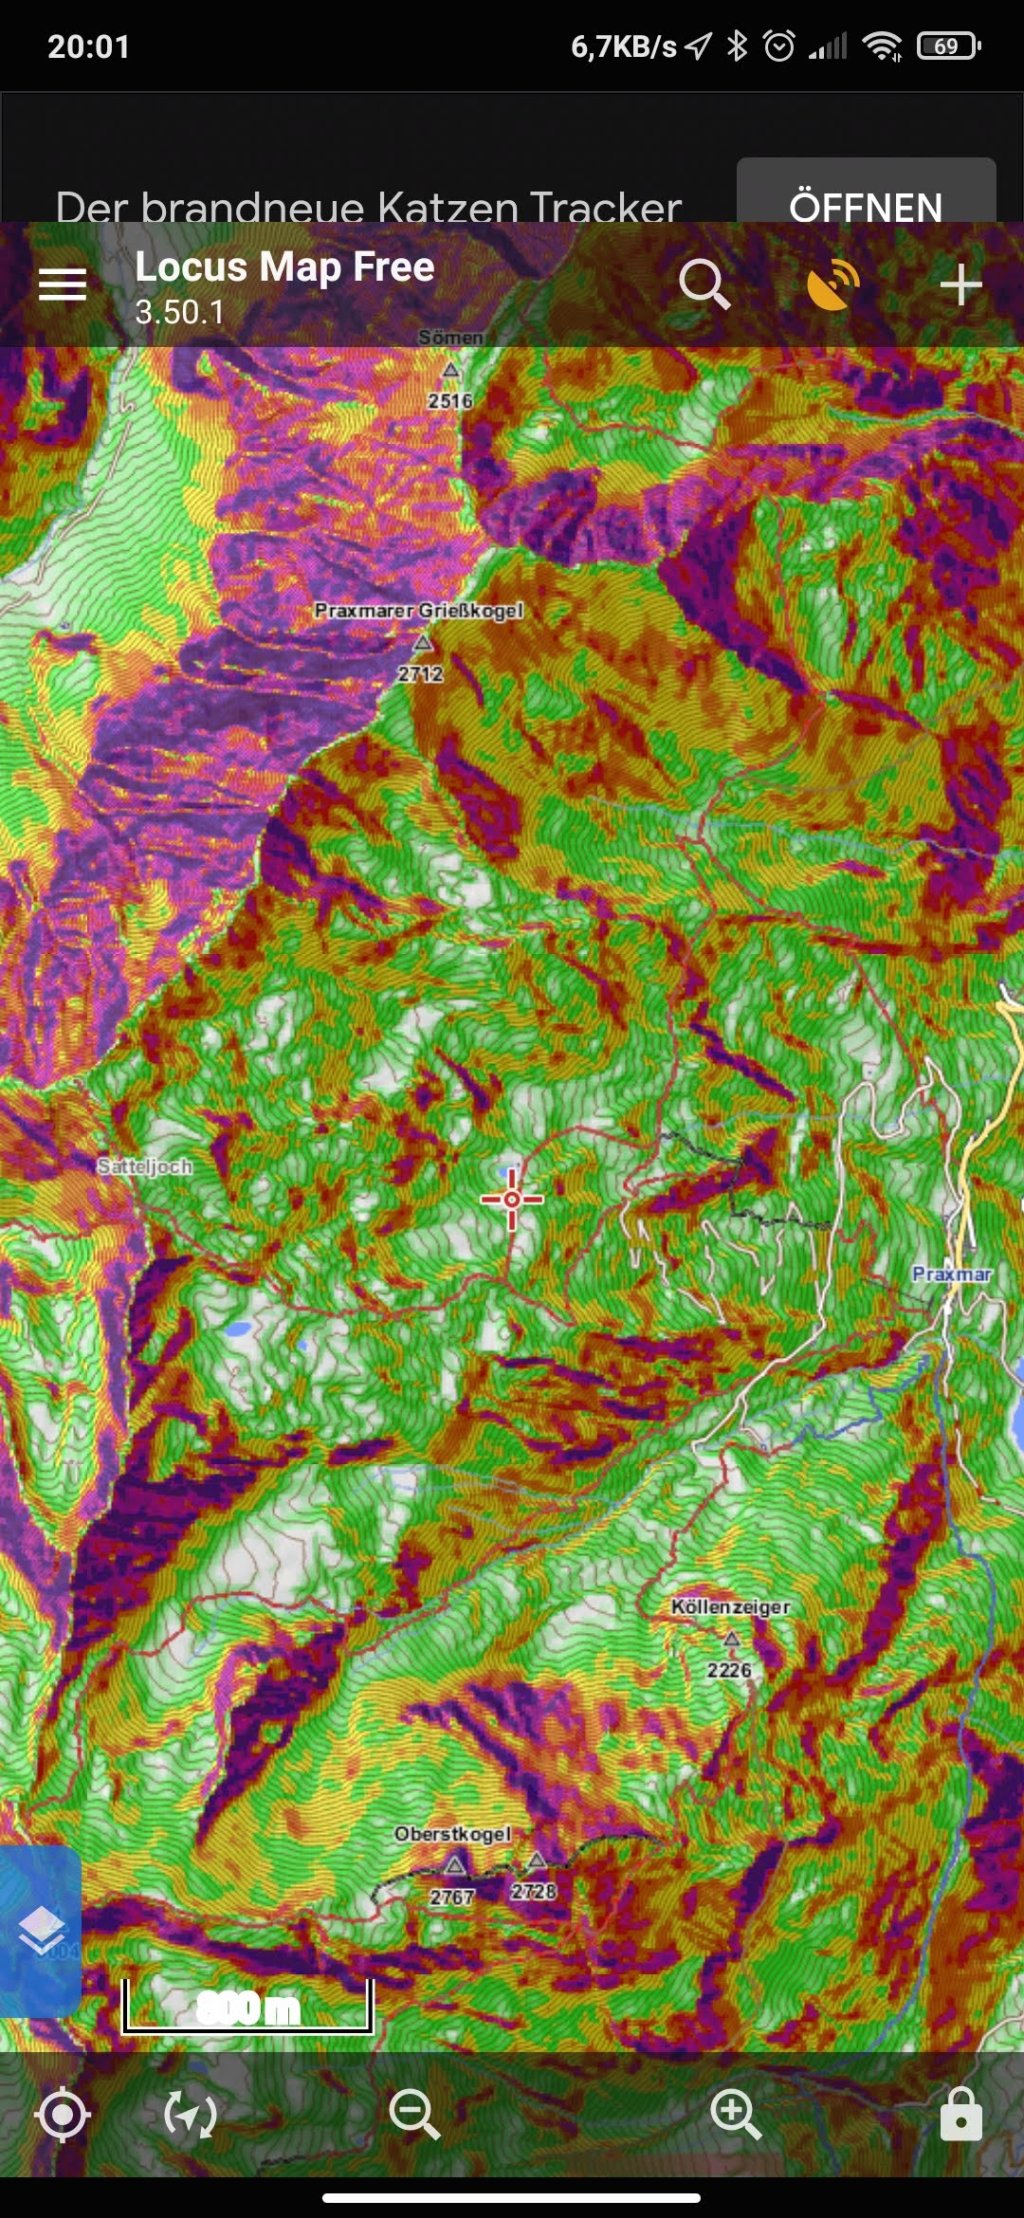
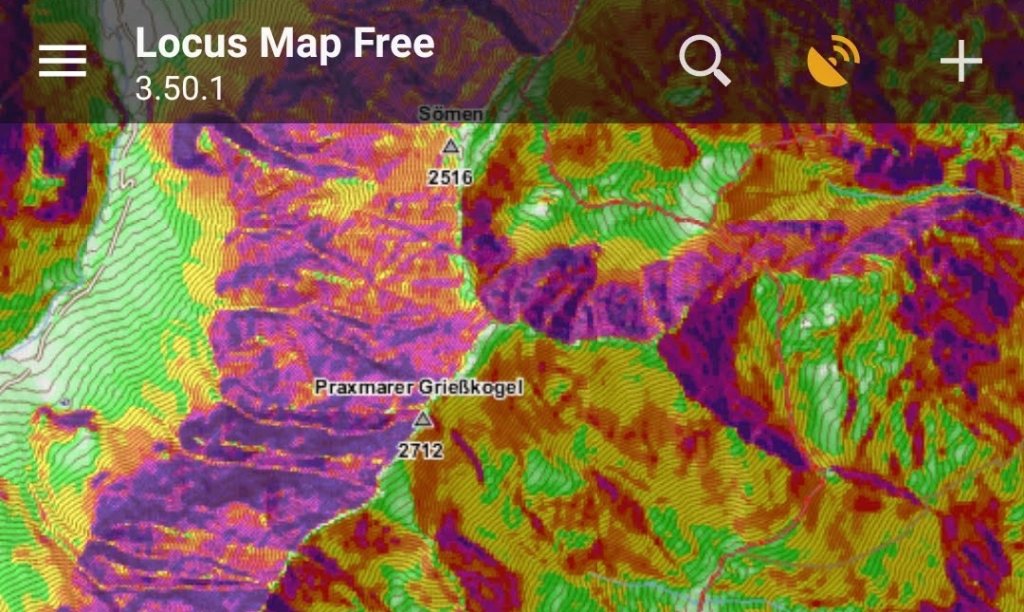
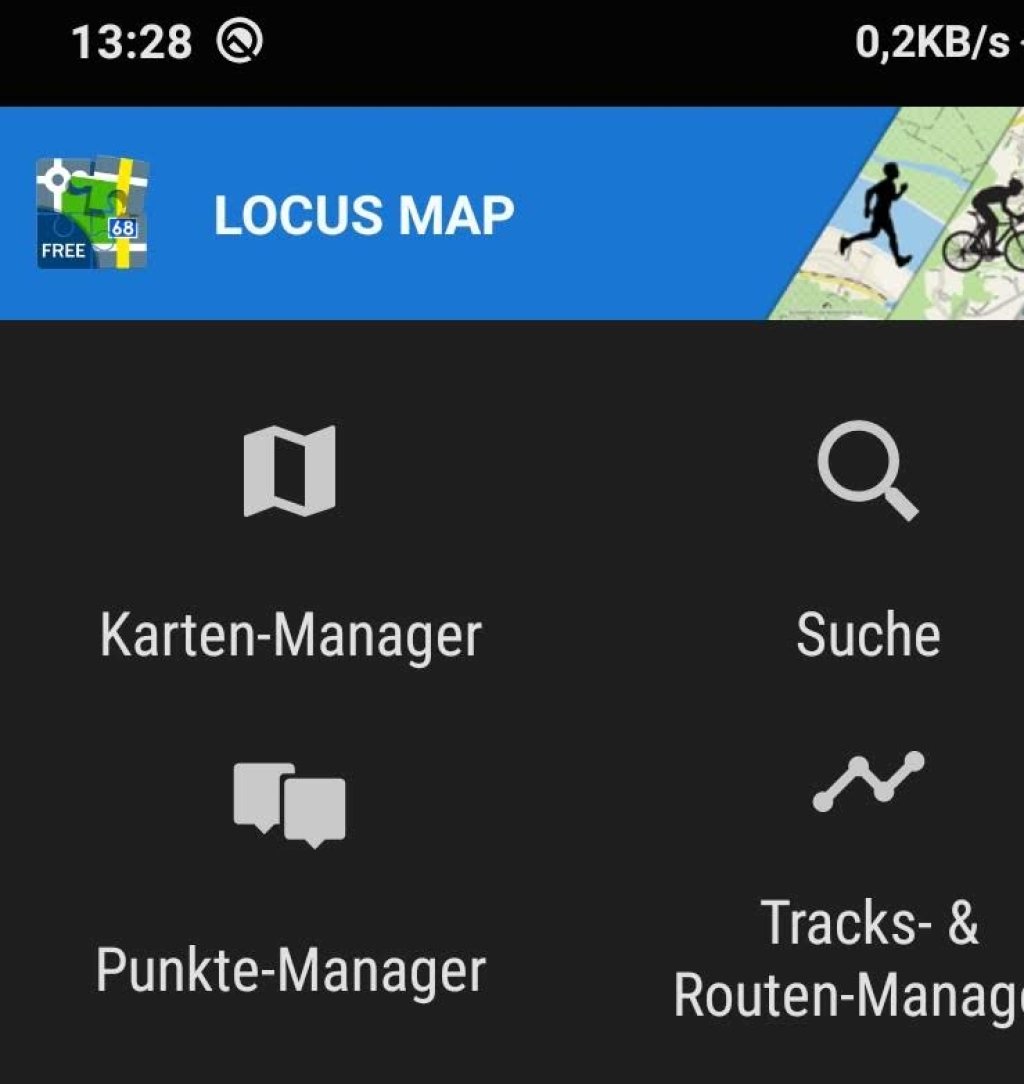
A confusing number of free, paid and subscription apps means we are spoilt for choice. Since Openslopemap offers the maps for 2 applications as a direct download, I will focus on these two apps here: Oruxmap and Locus, with a focus on Locus due to its faster map display. Both have their advantages and disadvantages and depending on the problem, sometimes one app works better than the other. An older version of Oruxmap can be downloaded free of charge from the project page, the latest version is currently available in the Playstore for €4.19. Locus offers the free version for free, while the much more comprehensive and ad-free Pro version currently costs €9.90.

Smartphone

Since no special computing capacity is required for map processing, older Android smartphones should also provide sufficient processor power. Unfortunately, it is currently not possible to install Oruxmap or Locus on iOS. In addition, Openslopemap does not offer any maps that can be installed directly on the iPhone. It is therefore always necessary to transfer maps to the iPhone via the PC.

In contrast to computing power, the memory requirements for offline maps should not be neglected. For the method shown in the first part, for example, at least 1.8 GB of memory must be available for the state of Tyrol in low resolution.

Installation instructions Openslopemap

But enough theory, let's get down to business! First, I will present the installation of the Classic Openslopemap, which corresponds to the well-known online map. In the following instructions, we have opted for the free version of Locus, as this means there are no costs for the time being. However, installation under Oruxmaps also only differs in a few respects.

Our smartphone is in front of us and we are ideally connected to a Wi-Fi network due to the high data volume that will be generated immediately. We search for the Free Locus app in the Google Playstore and install it. After starting the app for the first time, we are asked to confirm the privacy policy as usual and our operating system asks for consent for the required app permissions. The default online Openstreetmap is now visible, but we want to have the slope maps available offline.

We therefore call up the download page of Openslopemap in the browser on the smartphone and now select the desired "Classic" map (Attention "Overlay" requires an existing map. More details in the next part). For Tyrol, for example, the entry "Tyrol [Low Resolution | mbtiles | 1.8GB | up to tile size 15]". We are now asked which program should be used to open the file. Here we select "Locus Free" and can monitor the download progress in the app. While we are waiting for the data to download, it would be an ideal time to make a small donation to the developers of Openslopemap. After the successful download, we select the button with the 3 bars in the Locus app and click on the "Map Manager".

Now we find our map with the name "OSloMap_Tirol_15" under the "OFFLINE" tab.

A brief introduction to Locus

Now let's take a look at a few basic functions in the Locus Free version:

We've already seen the settings menu with the 3 stripes. Here we find all the functions, the Locus Store, which can be used to purchase map material, and the very extensive settings, which can be used to change practically all modules of the interface as required. A search function, access to satellite data and the option to integrate additional quick commands complete the top menu bar.

The blue tab at the bottom left gives us quick access to various map contents.

The bottom menu bar contains 5 fields with the following options:

  • The crosshairs center the map display directly on the determined viewpoint.

  • By selecting the arrow, we can either rotate the map with our line of sight or at least display the line of sight on the map.

  • Zoom out/in. This also works via a "pinch to zoom" gesture on the screen, or the smartphone's volume buttons can be configured as zoom buttons in the settings menu.

  • The padlock gives us access to various locks. This means that the smartphone can also be transported with the display switched on.

Now, to answer the first question mentioned at the beginning: Where am I? a quick glance at the smartphone should be enough!

--> Continue on the next page with an explanation of overlay maps for slope inclination.

Part 2: Overlay maps

Do you already have your own maps and want to give them an upgrade in the form of colored slopes? The map material used in the Openslopemap is too colorful for you and you sometimes lose the overview? The resolution of the Classic Openslopemap is too low for you? No problem, map overlay is the solution here.

This simply displays different map material overlaid in different layers. Unfortunately, Locus Maps only offers this function from the Pro version onwards. However, the cost of the Pro version is quite manageable at a one-off €9.90 and, in addition to the overlay function, Locus Maps Pro also offers a few features that we ski tourers like: a dashboard, offline elevation data and unlimited track recording. Of course, overlaying maps also works with Orux Maps. A guide to Orux can be found here.

Before we get down to business, let's start with some dry theory. If you lose interest in the following paragraph after just a few words, you can easily skip to the practical part.

Elevation data

The Openslopemap does not calculate the coloring of the slope gradient from the contour lines of the classic maps, but uses terrain models created using LIDAR (laser scan data). On the homepage we also find different download links for different resolutions. As a high resolution requires a large amount of memory, we must of course be guided by the free memory space of the smartphone. However, as the overlay data requires less memory than the classic map, this should not be a problem with modern smartphones.

What resolution do I need?

Let's first address the question of the minimum resolution for avalanche assessment. It is clear that the further I zoom into a slope, the more likely I am to find very steep slope areas. Just think of a stone lying on a flat meadow, the sides here reach an inclination of over 90°! The current conventional wisdom is that a steepness over a range of approx. 20 meters is decisive in planning. As we are always dealing with distances in the plane on a map, these altitude meters must be converted using trigonometry. In avalanche science, the highest slope steepness used as a reduction factor is 40°. In nature, however, the terrain does not only consist of straight lines, so we have to choose a resolution that can also recognize convex or concave shapes. A brief excursion into signal theory is necessary here and the Nyquist-Shannon sampling theorem, also known as the WKS sampling theorem, must be applied: "The sampling theorem states that a signal band-limited to f_max
can be reconstructed exactly from a sequence of equidistant samples if it was sampled at a frequency greater than 2 x f_max." Sounds more complicated than it is! All we have to do is double the sampling rate, in our case resolution, to fully represent a signal in the required range.
An example: We also use the sampling theorem for CDs, for example. The human ear is capable of hearing frequencies between 20Hz and 20kHz, so the sampling rate (sampling frequency) for the CD was set at 44.1kHz (=2x20.5kHZ). We have now come up with an elegant formula:

Altitude meter * cot(slope steepness) / sampling theorem = resolution.

We enter our values:

20m * cot (40°) / 2 = 11.9 m

We have calculated that the resolution must be at least 12m. Not so difficult after all!(Of course, other factors such as quantization and systematic errors must be taken into account for an exact calculation, but this would go beyond the scope of this article.)

According to the website of the Openslopemap project, data from Austria and South Tyrol are available in a 10m resolution. Other countries only provide data with a lower resolution and so these are extrapolated using bicubic interpolation. Wait - bicubic interpolation??? What does that mean again? In short, not only the values of a contour line are considered for the calculation, but all surrounding points. This means that the terrain between the actual measuring points is approximated by a calculation. How accurate this estimate really is can only be checked in the field. For Tyrol, Salzburg, Vorarlberg and South Tyrol, there is even bicubic interpolated data from 5m terrain models, which corresponds to a resolution of 2.5x2.5m. However, even such high accuracy should not obscure the fact that a map can never reflect the actual conditions 100% correctly. Your own assessment of the slope steepness in the terrain is therefore always necessary and needs to be practiced!

Map data

Now we need a map placed under the colored slope inclinations. If you already have a topographic map such as the digital AV maps or the Swisstopo maps (these are even freely available from March 1, 2021!), you can of course continue to use them under Locus Pro. I have opted for Openandromaps in the following tutorial. These maps, which are based on Openstreetmap, are aimed particularly at hikers and mountain bikers and can be downloaded free of charge from the internet. This map is also an ideal starting point for us ski tourers due to its reduced scope of information depending on the zoom level, which can be combined with the slope inclination layer of the Openslopemap.

Installation instructions overlay

But let's get started!

As in the first part, here's another note: large data packages are required, so if you don't have unlimited data volume, it's better to make sure you have Wi-Fi activated. First, we buy the Pro version of Locus Maps in the Android Play Store and carry out the installation process. Now we switch back to the browser on our smartphone and go to the Openandomaps download page. Here we first find the link to the different render themes. We need one of these, as otherwise our map cannot be displayed correctly, e.g. contour lines etc. are missing. I use the Elevate 4 theme also used by the Openandromaps programmers.

While Locus is installing the theme, we can already proceed to the map download. We select the "+", e.g. for Alps to select the entire Alps, and click again on the installation link for Locus. And once again, please note that the developers of Openandromap are also happy to receive a little recognition for their work!

Now we find the base map on our smartphone and we can download the slope inclination layer from the Openslopemap homepage in a similar way. To do this, we call up the page in the browser again: www.openslopemap.org/download. Here we can download the slope inclination maps for the entire Alps. As mentioned above, the underlying data is not completely available in a resolution of 10x10 meters. Slope inclination overlays for Tyrol, Salzburg, Vorarlberg and South Tyrol are also available individually in the highest possible resolution.

Finally, we need to activate both maps. To do this, we select the Openandromap as the base map as shown in the first part. Now we select the symbol with the two rectangles (overlay of maps) in the functions and apply one of the downloaded Openslopemap overlays as an offline map. The transparency can now be changed as desired.

Voila also answers the second question: Where are the dangers lurking? The smartphone should now be able to provide us with good assistance.

--> Part 3 on the next page contains instructions on importing and creating GPS tracks

Part 3: Importing and creating GPS tracks

We now have very good starting material for moving around in open terrain. But of course, a ski tour has to be planned first. We can find various online and offline tools on the internet for this. Currently, the website skitourenguru.ch has a particularly unique selling point: all tours available there are linked to the local avalanche report and a specific risk level is calculated for the respective tour. The skitours-paradise homepage also offers a similar function, but here only the danger level is displayed with the "Author's subjective assessment of the avalanche danger level at which the tour should not be attempted". Of course, we can also consider any other source, the only important thing is that it has a GPX export. It should be noted here that although many planning tools integrate slope gradient maps, these are often still based on SRTM (Shuttle Radar Topography Mission) data, which only offers a resolution of 30x30 meters. In addition, the color representation of the slope inclination is not standardized and each app can color the inclinations as it sees fit. Therefore, it is best to check the imported track on our map app, so we can be sure which terrain model the slopes are based on and which color represents the respective slope.

Once the GPX file has been fully downloaded, our smartphone asks us which application we would like to select to open the file. Here, of course, we select Locus and the map app opens. The import dialog is displayed, we can specify the storage location and if we have selected the "Show on map after import" checkbox, the display immediately jumps to the track we have just imported. As mentioned earlier, we can now check the planned ski tour for danger spots. As soon as this has been done conscientiously, nothing stands in the way of a ski tour. A route guidance system with spoken announcements seems a bit excessive to me on a ski tour, but this function is definitely interesting for bike tours.

Of course, the reverse process is also possible: we go on a ski tour and our smartphone records the route we have taken. To do this, simply select the "+" symbol in the "Tracks & Route Manager" and activate the desired type of tour with the start button. Attention: unfortunately, newer Android versions are very rigorous with energy optimization, with my MIUI system it is not enough to simply deactivate the energy-saving mode for the app, the app must also be provided with a lock in the "last app" view and thus locked for the operating system.

Tips and tricks

We can not only use the track import to display pre-drawn paths, it is also suitable for marking special areas that are not yet shown separately on the base map. I am particularly interested in wildlife rest areas. Here those of Tyrol. We can practice our sport in a more nature-friendly way by leaving the animals their retreat!

This should also answer our last question: Where do I want to go? sufficiently and we can even answer the additional question: Where am I not allowed to go?.

An overview article on common "All in One" map apps, which generally work with a subscription payment model, will follow soon.

Photo gallery

This article has been automatically translated by DeepL with subsequent editing. If you notice any spelling or grammatical errors or if the translation has lost its meaning, please write an e-mail to the editors.

Show original (German)

Related articles

Comments