In episode two of the freeride summer training, freeride coach Christian Haas explains exercises for intensive stabilization and endurance training.
Stabilization training
Some of you will probably be wondering what the term stabilization training is all about. When freeriding, enormous external forces act on our body and it has to withstand these forces. If we exclude cliff drops of 25 metres à la Basti Hannemann, the focus is on stabilizing our upper body in relation to our legs, as this is where the main stresses occur, for example when cornering and balancing the upper body. And why? First and foremost, it's to avoid injuries and incorrect strain and secondly, to be able to adopt an optimal position in order to corner or land a jump safely. The muscles required for this are often referred to as the "core area". Or more specifically: the abdominal and back muscles, the large gluteal muscle and the front and back of the thigh.
So much for the theory, now for the exercises. They are quite easy to understand and the pictures provide an additional visual aid. When performing the exercises, you must adhere to the following guidelines: When it comes to strength and stabilization training, quality counts more than quantity - to avoid injuries and incorrect loading!
The guidelines: be fully concentrated during the exercises and do not allow yourself to be distracted, not even by your friend, your mother or your pet. You can use a gym mat or a sleeping mat as a base (not the pet!) and wear shoes. During the session, which should not last longer than 10 minutes in total, make sure you breathe evenly (note: not breathing is not even!). The tricky thing is that you have to push yourself to your limits with each exercise. Just before you can no longer hold the position, you set down and go straight to the next exercise without a break. As you will improve, there are opportunities to increase your performance for each exercise so that you can always reach your maximum within the 10 minutes.
Front support
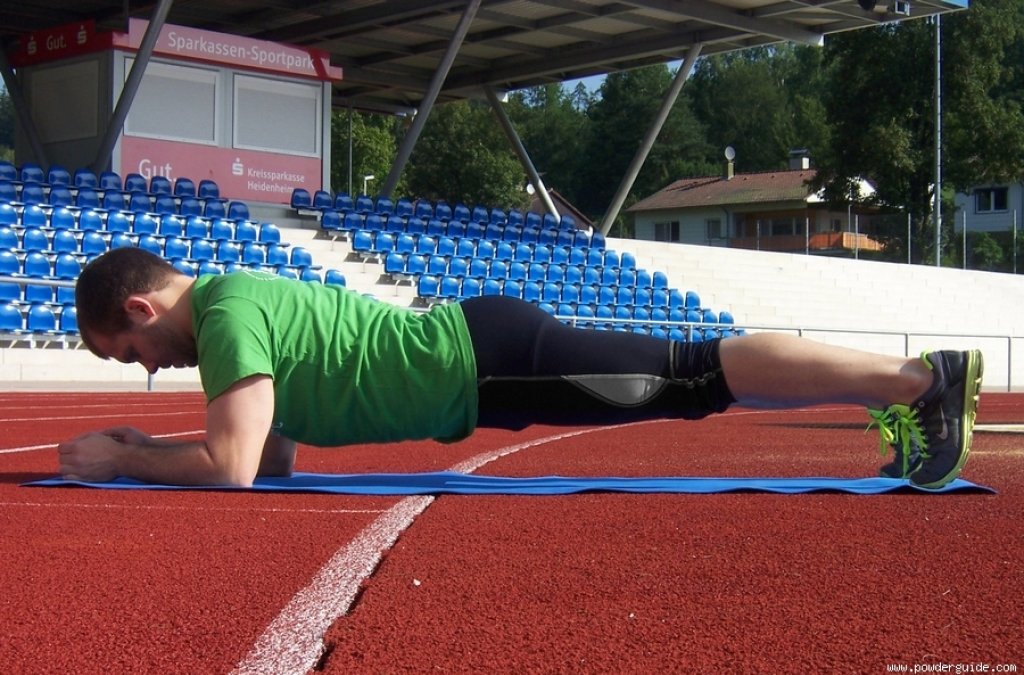
This exercise is relatively easy in the basic position and can be found in almost every 'abs, legs and bums' workout. To make the exercise more difficult, or rather more effective, we will now try to unbalance your body using simple means. In this basic position, you should make sure right at the start that you don't fall into a hollow back. Your back should be arched. Your legs should also be quite wide apart, which can also be varied. You should keep your body axis still and it's best to place your elbow directly under your shoulder.
To the climbs: First of all, you can add some momentum by doing a maximum of 3 push-ups from this position. Another option is to reduce your support area by only leaning on one forearm.
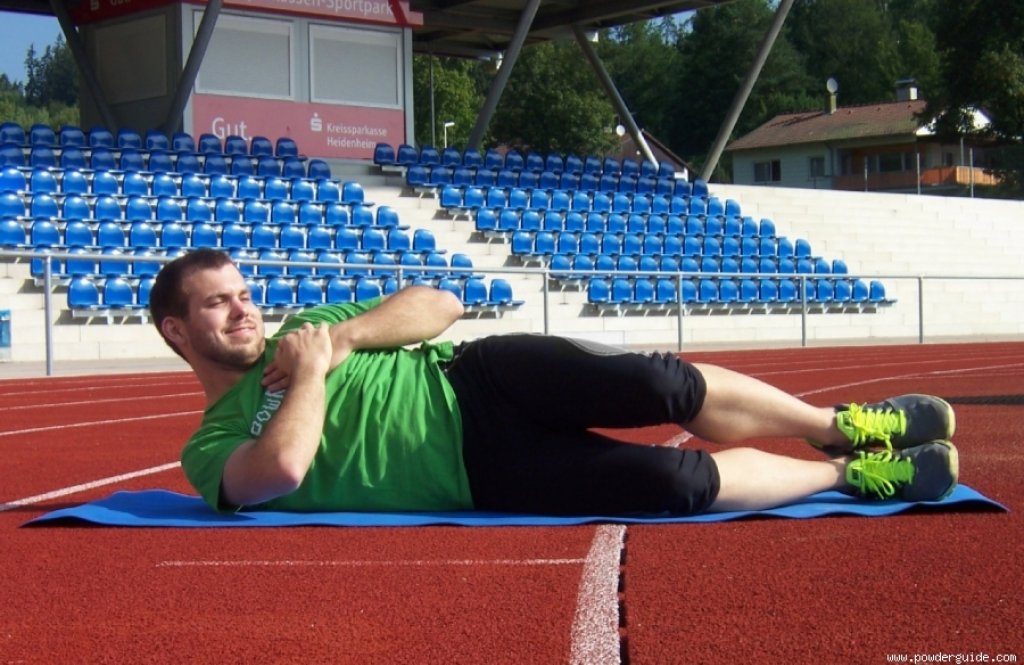
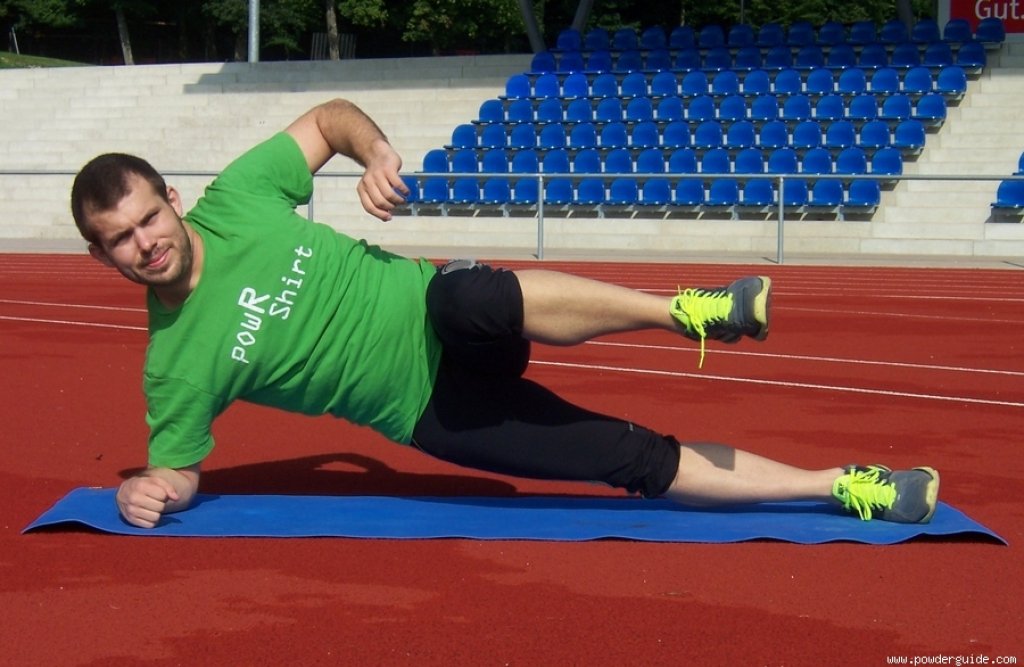
Side plank (or: the coffee cup)
The second basic position is also quite easy to perform. It is important to pay attention to the following: Chest out and your body axis must not twist. It helps to imagine that you are balancing a coffee cup on your upper knee. The difference between this and a classic side plank is, on the one hand, that we bring more weight into the center of the body through our tucked leg. On the other hand, we try to reduce the support surface by lifting the heel of our supporting leg off the floor and leaning only on the outer instep. To increase this, the body axis can be lowered and raised again to create some momentum.
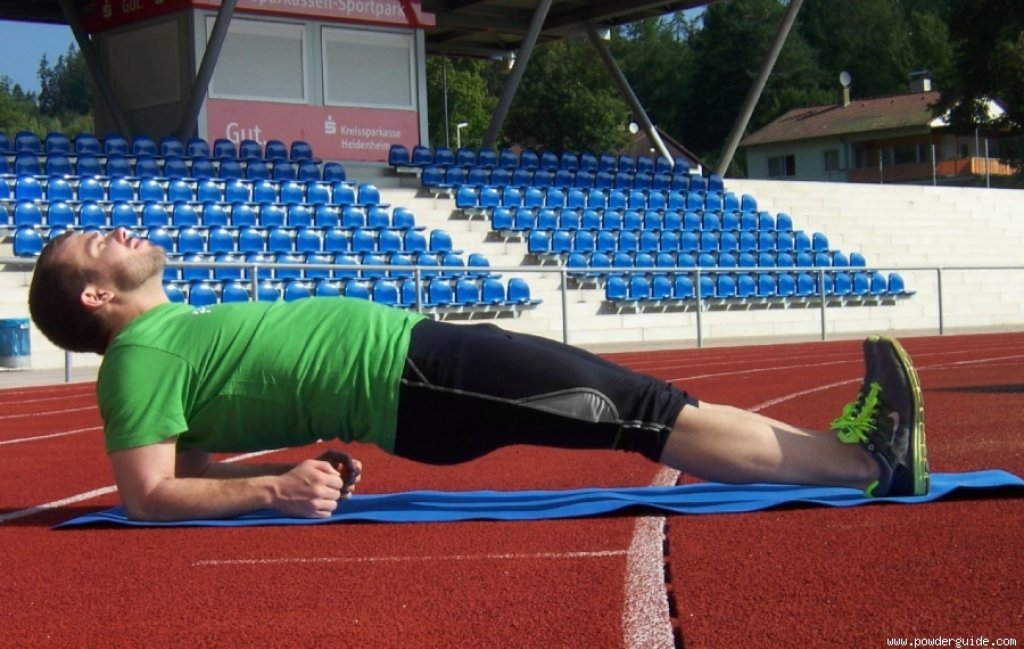
Back support
When doing the back support, it is important that your elbow is relatively far back and below your shoulders. You are only supported on your heels and forearms. Make sure that your knees are slightly bent to avoid injury. To make it a little harder, alternately lift one foot slightly (1-2 cm is enough) off the floor without tilting your pelvis. You can also make it a little harder by spreading your legs a little further apart in the starting position. As you lift your heels, it will also be more difficult to keep your pelvis in position.
Sit-ups
In addition to the previous exercise, three types of sit-ups are now used. Just a reminder: We are still in the stabilization area and proceed according to the same principle: Quality over quantity!

Classic sit-ups
Yes, the classic! You do normal "abdominal elevators", everyone should have seen them before. The following points should be noted. Firstly, you don't have to use your full range of motion, it's enough to make small and quick movements. Make sure that the abdominal muscles are not fully relaxed or tensed at any of the inversion points. The best leg position is to have a 90-degree angle at the hip and knee joints and keep your legs in the air in this position. You can hold your arms next to your head or on your chest, depending on your mood. You should avoid placing your arms directly against the back of your head, as you will then tend to actively support the movement with your arms. As we don't want to train our arms but our abdominal muscles, this would be counterproductive,
Shake it's
To perform the so-called "shake it's", you need to get off your exercise mat and onto a floor that is as slippery as possible. Parquet or laminate flooring is perfect. You start in the same position as for classic sit-ups. Lie on your back on the floor with your legs in the air at a 90-degree angle. Now lift your upper body slightly to create tension on your stomach. Now rotate your buttocks back and forth quickly. Your upper body will help you to balance out the rotations.
Lazy sit-ups
You lie stretched out on your back. Now pull your legs up until you have a 90-degree angle at the knee joint, keeping your feet on the floor. Now turn your upper body to the side in this position. Now do the same as the classic sit-up. You straighten up slightly towards the ceiling. The range of motion here is very small, so don't be surprised.
Lactate capacity
In the last episode, I explained why we train this area. By training your lactate capacity well, you can ensure that you can ski or freeride all the way to the end of a descent. For my athletes Basti Hannemann and Fabi Lentsch, this is the crucial skill for future success in freeride competitions such as the Freeride World Tour.
How does the training work? It is important to have already worked intensively on your GLA (= basic endurance). As already mentioned, this ability is the foundation. Before starting the sessions, you should perform 10 minutes of exercise at the effort level of the GLA training. After that, you're off. You move very intensely for one minute. It is important that you exert yourself properly (e.g. with a high gear on the bike or a hill sprint/run). Then take a break for about 5 minutes. But don't sit down, keep moving until your heart rate feels about the same as after the warm-up. Do 10 repetitions, then continue to move loosely for another 5 to 10 minutes.
You will quickly realize that training lactate capacity is hard and hurts. But as soon as you're back on your skis or board, you'll thank yourself for those hard sessions. When I was in the USA for a while and trained with the local high school football team, there were team shirts with the slogan: "Pain is only weakness leaving the body!" - Pain is only weakness leaving the body. A bit archaic, but with a core of truth.
The better we prepare for a competition or our passion in training, the more successful we can be. And this is especially true when success is measured in fun, enjoyment and lots of good runs. So remember: Winter won't wait - train now.
Preview
In the next episode, we will be looking at sensible strength training. I hope you enjoy your training. If you have any questions, get in touch via my homepage POWRide or in the PowderGuide.com forum.
Text: Christian Haas